Showing posts with label MFTstamps. Show all posts

Saturday, April 01, 2017

'Go for double' with this clear window Shaker card!

Hellooo lovely friends,
Today I have a cool card idea, I know you are going to LOVE! Using the fabulous Foam Front Polaroid Die & Card Set from Queen & Co, I did something a little different with this set...I created a double window, clear on both sides, so one can read the Happy Birthday sentiment inside the card.
Happy Birthday Card by Kim Watson

KimWatson_HappyBirthday_Q&Co_01

Using the card foam front, along with x2 cellophane window pieces, I filled the window shaker with a festive mixture of colored, Sequin Sprinkles & clear Tiny Bubbles. The combination of colors mixed with punched black stars give the card a wonderful celebratory vibe. Using the 2nd piece of cellophane, I 'closed' the shaker, then by positioning the die on the actual card to fit directly under the foam polaroid, I was able to simply create a window, allowing one to see the sentiment stamped (TCP Studio) on the inside of the card.

KimWatson_HappyBirthday_Q&Co_02

What better way to decorate a birthday card than with a cute cupcake. I drew the cupcake onto cardstock, then filled it with washi tape frosting. A sharp craft knife trimmed away the excess, leaving a scrumptious cupcake accent.

KimWatson_HappyBirthday_Q&Co_03


I hope you like this one!! 
Thanks for stopping by!
~Kim

Friday, March 31, 2017

Make waves with Queen & Co Foam Front cards!

Hi everyone!
Kim Watson here today with a card created, using the fabulous Foam Front Waves Die & Card Set. What I love about the Queen & Co. shaker and die card kits is that they take care the hard part of putting the card together, we get the fun part...decorating them :D

Happy Birthday Card by Kim Watson

KimWatson_WishingYoutheBest_Q&Co_01

Cutting a piece of texture board 4 1/4" x5 1/2" I created an ombre effect using Shimmerz paints mists. To do this, I spritzed my craft mat with water, then made puddles of color, in order of how I wanted the colors to blend. Swiping the texture board through the colors left me with a gorgeous ocean inspired ombre color-wash. This I die cut into a wave card front.

KimWatson_WishingYoutheBest_Q&Co_02


Using the card foam front, along with the cellophane window piece, each wave was filled with a combination of toppers. The different varieties mixed together helped me match the surrounding ink colors more accurately. The effect is a pretty ombre, to match the color wash. Embossed & punched clouds make the cutest cluster at the top of the card.

KimWatson_WishingYoutheBest_Q&Co_05

A stamped boat image (Paper Smooches) with the sails filled in with aqua striped washi tape, adhered to a circular badge, a scattering of red buttons and a banner sentiment (Simon Says stamp & die set) are the perfect accent to finish off this sweet, summer inspired card.
Thanks for stopping By!
Kim

Thursday, February 26, 2015

How to use 6x6 and 8x8 paper pads!

Do you squirrel away your 8x8 & 6x6 paper pads like I do?? I look at them & feel bad that I am not actually using them, so thought I'd challenge myself to try. This is the result!

8x8 pads don't have to be limited to mini books, I used 5 pages from a 8x8 pad to create the entire layered background on this double page. 

I am proud to share it was published in a local print magazine: Scrapping & Kei. Many thanks to Liezel & the team for selecting it.  

It page about one of my closest friends, Lisa. Everything about the page is a reflection of who she is. It is a gift for her birthday to be hung in her bedroom :)
  • She is a girly girl
  • Loves the pretty things in life.
  • Loves gold accessories & home decor accents.
  • Crazy about cute critters.
  • One of the strongest people I know. 
  • Has beautiful, kind & thoughtful personality.

Hello my Name is Lisa by Kim Watson

Supplies: Digital supplies: Actions by Sweet Shoppe; Cardstock: +Bazzill Basics Paper ; Patterned paper: +Cosmo Cricket , +Glitz Design ; Stickers, Paper leaves, Gold Brads: +American CraftsFrame: Jillibean Soup; Tags: Elle Studio; Wooden Veneer: +Freckled Fawn, Cosmo Cricket; Fabric pom-pom: +Basic GreyStamp, Ink: +My Favorite Things Stamps; Mist: Maya Road, +Ranger Ink ; Stencils: The Crafters Workshop; Adhesive: +TombowUSA , +Thermoweb , 3L; Tools: Scissors, Mat & Trimmer: +Fiskars ; Other: Typewriter, Vellum, Buttons. 

How-to create the collage background:

  • Select 'muted' co-ordinating paper designs.
  • Cut the pages into different width paper strips.
  • Layer over one another to create a well balanced collage.
  • Adhere along the top edges of the paper only leaving the bottoms loose for 3 dimensional texture.
  • Mist entire page with opaque white mist. Allow enough drying time. (White takes longer than usual colors.)
  • Splatter with highlight color and paint water color dots in a 3rd color, creating an interesting background.
  • Once dry, add decorative stitching.
  • Complete your page on top of patch-worked background. 

Paper leaves, journaling onto vellum, buttons, brads & tags make this page a winner! 


My title was matted onto a big stamped image by My Favorite Things stamps...isn't it divine! More buttons, a heart badge & glittered bling add lovely focal points to the page.

I hope this technique has inspired you to haul out those smaller pads & get them onto a scrapbook page.

I'm glad you stopped by!


Tuesday, September 16, 2014

Channelling your scrappy heros!

You have scrappy heros right? I know I have plenty!

Today I wanted to show you how one can successfully lift/ channel someone without a direct copy. For this page I incorporated x2 lifts into one page, with fun results. I used inspiration both from layout, accents placement, color & photo layout ideas.

Many thanks to the very inspirational designers who's pages I used for this demonstration.

Wilna Furstenberg
Yuki Shimada 
 The Things You Do by Kim Watson
You can clearly see evidence of both pages in my final page above. 

Supplies used: +Fancy Pants Designs-Me-ology collection, +Echoparkpaper-Basics patterned papers, +Thermoweb adhesives, +TombowUSA adhesives, +Ranger Ink inks. 


 I used the idea of paint strips like Wilna did & added die cut numbers, with ombre paper underneath for interest. 

Using multiple dies I created a selection of custom made badges as accents on the page. 

All dies from +MFTstamps, check out their on-line store, where you can purchase any of the dies shown below. 

Die-namics LLD Accent It - World Traveler

Die-namics Pinking Edge Circle STAX

Die-namics Happy Hellos

 Thanks for stopping by!

Monday, August 04, 2014

#fancypantsdesigns july sketch + 5th aug deadline

Crafty friends, do you know what day it is tomorrow??
It is the deadline for the July sketch #contest for +Fancy Pants Designs? Have you gotten your entry in yet??

There is a COOL PRIZE up for grabs... hehe! I know what it is...and you are guaranteed to LOVE it! But that is not all, you also stand a chance at being our featured designer in next month’s newsletter!

NB: In order for +Fancy Pants Designs  to view your layouts, post them on their Facebook page, or tag them on Instagram (#fancypantsdesigns) by August 5th (tomorrow), making sure to use this month’s sketch, along with Fancy Pants Designs products.

Here is the #fancypantsdesigns July sketch!

This is my take on the sketch, hopefully it will inspire you to get your crafty groove on...:)

Backyard Stroll by Kim Watson

Come on...hurry...I can't wait to see all your entries.


Tuesday, May 27, 2014

Scrapbooking with faux chalkboard techniques

During a recent interview with +Debbie Hodge  over at #MasterfulScrapbooking, we were discussing a faux chalkboard technique on my page Wild Child created for the Process Play article, where I used a white gel to transform plain black alphas.

As promised this is the other page I mentioned featuring a few #fauxchalkboard techniques I used for an assignment for the +Papercrafts&Scrapbooking May 2014 issue seen on page 44.


Live Life by Kim Watson
Supplies: Cardstock: +Bazzill Basics Paper ; Patterned paper, Decorative Bag, Buttons, Stickers, Die Cuts: (Memories Captured) +Fancy Pants Designs; Metal Flair: Evalicious; Clear stamps: Autumn Leaves (live Life- old), My Minds Eye (and), +MFT Stamps (enjoy the awesome journey, stars, triangle border), +Hero Art Stamps (speech bubbles), +Technique Tuesday (arrows), Cocoa Daisy Designs (arrows, chevron); Date stamp: American Crafts; Ink: Close to my Heart, +Close To My Heart; Stampin’Up; Embossing Powder: Stampin’Up; Color media: (pencils) Tombow, (white gel pen) Sakura; Adhesive: Tombow, Thermo web; Twine: +Close To My HeartTools: (mat, trimmer, scissors, punch) Fiskars American, (acrylic blocks, paper piercer, sewing kit) Close to My Heart, (heat gun) American Crafts, Sewing Machine

Idea #1:
Draw a double line border around your page & hand-write your journalinhg using a white gel pen. For an authentic chlakboard feel, shave actual chalk dust onto the page & gently rub it in in areas around the page, giving a chalky smudged effect. 

Idea #2:
Stamp speech bubble images onto black cardstock then emboss with white embossing powder for crisp white images. 

Idea #3: 
Create a chalkboard style conversational title using a mixture of fonts & sentiment stamps. Emboss with white embossing powder for crisper images. Using soft colored pencil crayons like the ones I used from +TombowUSA, work into your design using a crosshatching & rubbing technique for an authentic chalkboard vibe. 

I hope you feel inspired to try some techniques of your own....it is a fun creative technique to try!
Happy crafty Tuesday friends!

Tuesday, March 25, 2014

FREE cut file + Making magic!

Love this girl (can't believe how fast she is growing up), love these colors... love technology!

Getting loose with a large oversized painted ink title & cutting it out with my Cameo. I don't know if it is perfectly balanced...but hey...we get so bogged down trying for perfection in our scrapping, that we plain old forget how to just have fun.

Well I had fun with this page!

Those cute feathers are metal dies from My Favorite Things...check them out HERE>>


...thanks Laina Lamb for sending them to me X

Magic is Something You Make by Kim Watson

I have a FREEBIE: download here>>  for you too..... my 'big painted title', in a couple of file types.
(NB: For your personal use only!)
ENJOY!

Tuesday, August 27, 2013

Such pretty papers & a Tutorial!

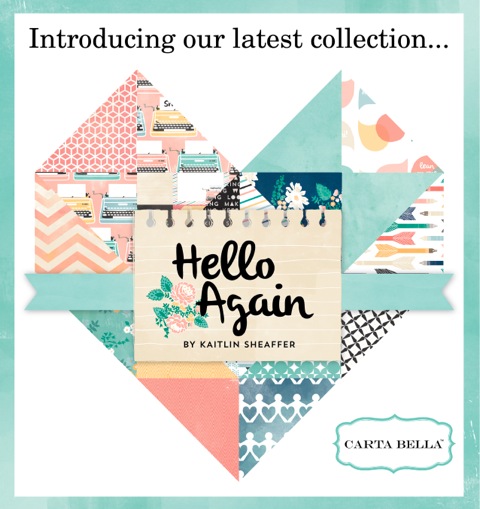
I had the privilege of working with the Hello Again collection from Carta Bella papers last week. Here are a couple of those pages. The others I still have to photograph.


 Remember by Kim Watson

A page about Ms Suzy Plantamura & our friendship. She is the cutest!! Why she has to live in LA...I will never understand :) Oh and all dies used are from My Favorite things,  Stamps from Elle's Studio.


Lifetime of Memories by Kim Watson
I created this page for the Creating Keepsakes Editors blog with a tutorial using adhesive sheets, punches & glitter.  


For a FULL TUTORIAL of this technique and images see here>>>
Thanks for stopping by & happy crafting friends!

Friday, May 31, 2013

NEW product test.... you'll love these!

This month I have had the privilege of playing with some amazing NEW products. The first designed by the talented Laina Lamb who is on the CK Dream Team with me.

1) EXPAND YOUR VIEW stamps
3) Die-namics LLD Accent It - Story Title
3) Die-namics Western Star Border Duo

AND

4) the Fiskars FUSE die cutting & embossing machine. 


Adapting the MFT's dies for the FUSE is a simple process. One can purchase the adapter plates to make the dies thick enough to go through the FUSE rollers.

This is my plate sequence:
1) Adapter base plate
2) Adapter Shim A
3) Rubber mat.
4) Adapter cutting Plate

As you can see from the tutorial above, you place your paper on the rubber mat, then the dies cutting edge down and the adapter cutting plate on top of the dies. Twist the handle a few times (which takes no effort at all) and your die cut elements pop out the other size.

Notice how clean the dies cut with great rounded corners.
Fabulous quality!

This is the page I created using these goodies together with the Down by The Shore collection from Fancy Pants Designs.

Keepin' It Reel by Kim Watson
 Cas & her BFF enjoying summer holidays together!


Close up of the 'viewmaster' die-cut.


Close up of the 'Memories' title die-cut.


Close up of the star border die-cut.

I encourage you to take a look at My Favorite Things online store...it is chocca with great stamps & dies. Hope this inspired you to haul out your manual die-cutting machine... I love the insta vibe, no waiting just place & cut.

Happy Friday my creative friends!