Showing posts with label Crafty fun. Show all posts

Thursday, April 13, 2017

Make a DIY Easter Bag & Card set in an hour

Hello friends…Kim here with a challenge for you!
Are you like me and have loads of  leftovers of collections just looking for purpose? Well I set myself a challenge for todays post..to find a purpose for the leftovers I have from the super-cute, themed, Millie & June collection. So I thought with Easter around the corner, that I would get a head start with my crafting & come up with a way to transform the supplies into an Easter gift set. The colors are fabulous & the patterns super cute…I knew right away it would not be difficult to do.
This is the result!
Easter Gift Set by Kim Watson
(Youtube process video to follow, see my channel or pop back to see this post once updated)


The first thing I did was look for a whole 12×12 piece of paper. I would need an entire sheet to create the gift bag. Once folded, I die-cut the bunny face to fit the width of the bag, rouged her cheeks, drew her eyes & mouth and then made the bows from the convenient Millie & June die-cut paper bow set.

The card was also super simple to put together. Using a strip of Our Garden patterned paper I cut a backing piece in the gold foil stripe & flipped the leftover piece using the floral side to cut a big pennant shape. I then die-cut a circle from the pennant, making a little window for the chick to peek out of.

The accents consist of a trimmed tag (to hide the sentiment) & a few patterned heart ephemera; which reminded me of Easter eggs. Not having the correct stamp sentiment, I used the speech bubble die-cut & hand wrote Happy Easter, which finished off the card nicely.
So as you can see, repurposing your themed products is not as complicated as you would think. I hope this has inspired you to haul those leftovers out, with the purpose of giving them new life 😀
Thanks for stopping by my blog! Have an awesome week!
Fancy Pants Designs products used: Millie & June


Sunday, October 25, 2015

My latest product designs for Hip Kit Club!

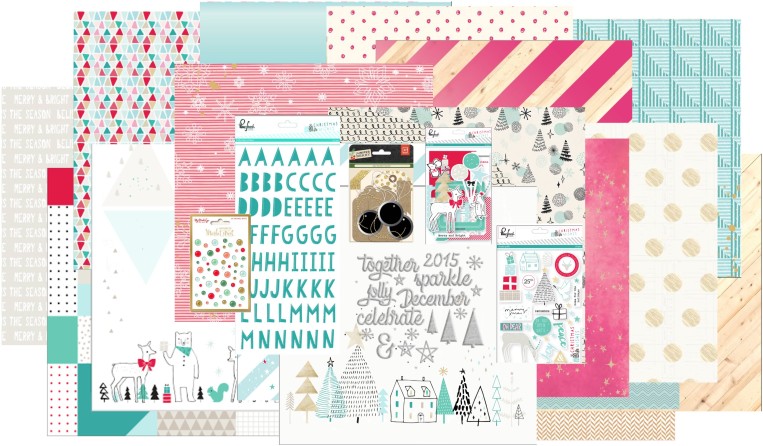
I am so thrilled to share the November Hip Kits today!  Our November collection is packed full of our FIRST EVER, HIP KIT CLUB EXCLUSIVE PAPERS & EMBELLISHMENTS, all designed by ME hehehe! This collection is called “Oh What Fun” and the name says it all!  We aren’t offering a November Project Life Kit as we have our DECEMBER DAILY KIT & it is FABULOUS!  Our November Embellishment Add-On Kit includes lots of goodies that will easily be incorporated into Project Life & traditional scrapbook pages alike.  We adore our color palette this month too – it is versatile and fresh with lots of neutrals and POPS of bright pink,red & teal.  Just looking at it gets me in the mood for our winter holidays.  I hope you like it as much as we do!  
HIP KIT CLUB NOVEMBER 2O15 MAIN KIT
Main

Hip Kit Club Member Price:  $29.95 (requires a 3 month minimum subscription)CLICK HERE to join!Individual Kit Purchase Price:  $34.95
Products Included:
  • 6 SHEETS – HIP KIT CLUB EXCLUSIVE “OH WHAT FUN” PAPERS – designed by Kim Watson
  • 1 sheet – Pink Fresh Studio – Christmas Wishes – Christmas Parade
  • 1 sheet – Basic Grey – Juniper Berry – Garland Paper
  • 1 PACKAGE – PINK FRESH STUDIO – HKC EXCLUSIVE – AQUA PUFFY ALPHABET THICKERS
  • 1 SET – HIP KIT CLUB EXCLUSIVE “OH WHAT FUN” – GLITTER DIE CUTS – designed by Kim Watson
  • 1 package – Pink Fresh Studio – Christmas Wishes – Puffy Stickers
  • 1 package – Pink Fresh Studios – Christmas Wishes – Die Cuts
  • 1 package – Basic Grey – Juniper Berry – Chalkboard & Glitter Tags
  • 1 package – My Mind’s Eye – Christmas on Market Street – Enamel Dots


HIP KIT CLUB – NOVEMBER 2015 EMBELLISHMENT ADD-ON KIT
Embellishment
Price:  $29.95**Hip Kit Club members receive a 15% off on all Add-On Kit purchases
Products Included:
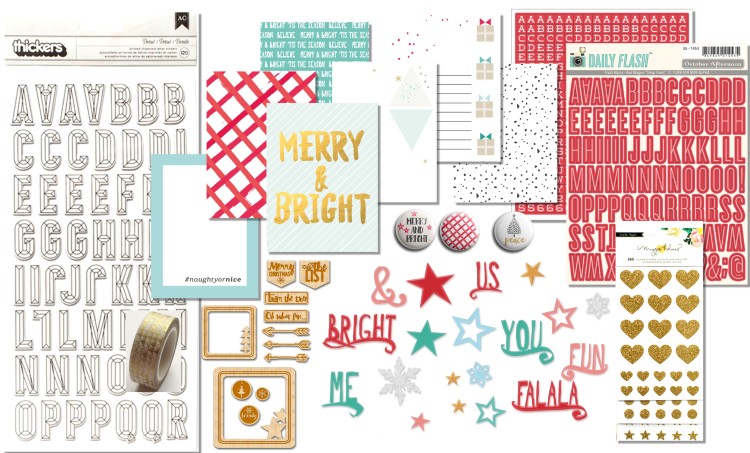
  • 1 seven 3×4 HIP KIT CLUB EXCLUSIVE – Journaling Cards – designed by Kim Watson
  • 1 set – HIP KIT CLUB EXCLUSIVE – Wood Veneer Die Cuts – designed by Kim Watson
  • 1 set – HIP KIT CLUB EXCLUSIVE – Acrylic Die Cuts – designed by Kim Watson
  • 3 – HIP KIT CLUB EXCLUSIVE – Flair Badges – designed by Kim Watson
  • 1 roll – Freckled Fawn – Gold Triangle Washi Tape
  • 1 package – Crate Paper – Maggie Holmes Shine – Thickers
  • 1 booklet – Crate Paper – Maggie Holmes Shine – Gold Glitter Accent Stickers
  • 1 package – October Afternoon – Daily Flash – Red Alphabet Stickers

HIP KIT CLUB – NOVEMBER 2015 COLOR ADD-ON KIT
Color
Price:  $15.95*
*Hip Kit Club members receive a 15% off on all Add-On Kit purchases
Products Included:
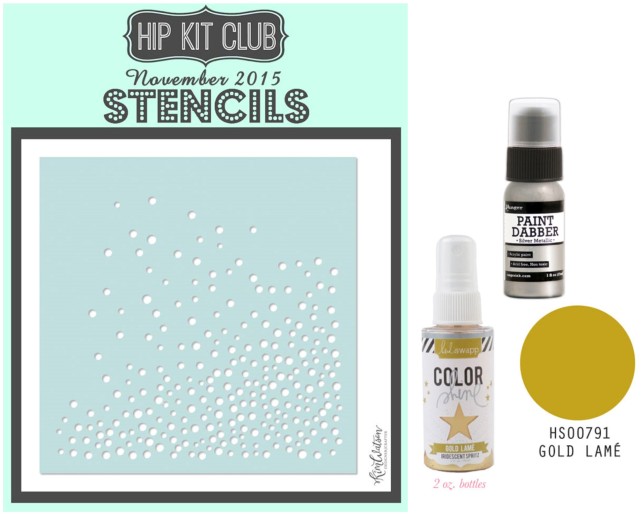
  • 1 Hip Kit Club Exclusive 6×6 Stencil designed by Kim Watson & Nicole Nowosad
  • 1 bottle – Heidi Swapp – Gold Lame Color Shine
  • 1 Ranger Industries – Silver Metallic Paint Dabber

HIP KIT CLUB – NOVEMBER 2015 PAPER ADD-ON KIT
Paper
Price:  $11.95*
*Hip Kit Club members receive a 15% off on all Add-On Kit purchases
Products Included:
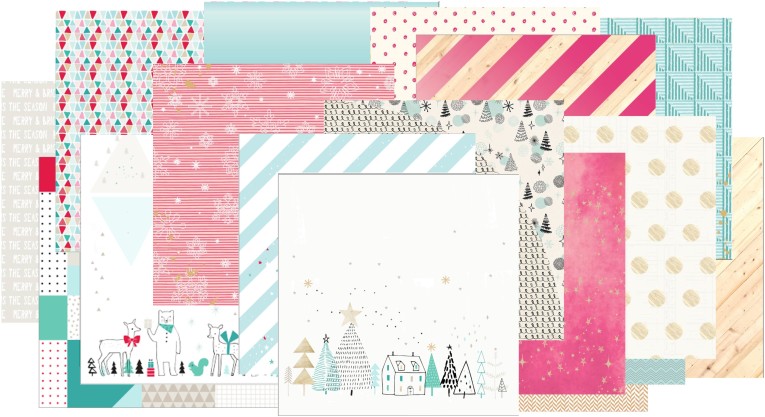
  • 6 SHEETS – HIP KIT CLUB EXCLUSIVE “OH WHAT FUN” PAPERS – designed by Kim Watson
  • 1 sheet – Pink Fresh Studio – Christmas Wishes – Christmas Parade
  • 1 sheet – Basic Grey – Juniper Berry – Garland Paper

HIP KIT CLUB – NOVEMBER 2015 CARDSTOCK ADD-ON KIT
Cardstock
Price:  $10.95*
*Hip Kit Club members receive a 15% off on all Add-On Kit purchases
Products Included:
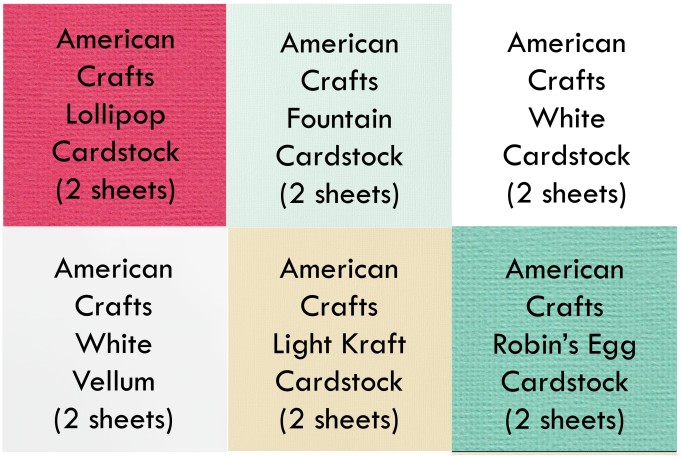
  • 2 sheets – American Crafts White Cardstock
  • 2 sheets – American Crafts White Vellum
  • 2 sheets – American Crafts Lollipop Cardstock
  • 2 sheets – American Crafts Light Kraft Cardstock
  • 2 sheets – American Crafts Robin’s Egg Cardstock
  • 2 sheets – American Crafts Fountain Cardstock

Saturday, January 03, 2015

Handmade tree Ornaments #4- Cornflour Clay Ornaments

As I mentioned the other day...I decided to make all my tree ornaments this year because my color theme & Christmas decor is so totally different from anything else I have done before & wonder of all wonders I actually got myself organised enough to take photos of my creative process.

Here is no. 4: (Scandinavian style)

#4 handmade cornflour clay ornaments!


Supplies:
  • Cornflour
  • White School glue
  • Mixture of letter stamps
  • Motif stamps or wood veneer
  • Straw to make a threading hole
  • Cookie cutters
  • Decorative twine for hanging

  • Measure out glue & cornflour using the ratio 2:1
  • Mix well together in an old dish. It will be super sticky.
  • Once mixed, tip out and knead well with extra cornflour to coat your hands.
  • Roll out to desired thickness. 
  • You have to work quickly not to obtain well defined imprints.
  • Push doily or doily stamp into clay, making a sharp impression.
  • Using cookies cutters, cut into a variety of shapes.
  • Use a drinking straw to make a threading hole at the top of the shape.
  • Using letter stamps & motifs decorate shapes.
  • Allow to air try for 24 hours.
  • Take glass sand paper smooth off any rough edges, thread with twine & hang.
So glad you stopped by!

Merry Christmas & a Happy New Year to you all!


Wednesday, December 31, 2014

Handmade tree Ornaments #3- Cork Reindeer.

As I mentioned the other day...I decided to make all my tree ornaments this year because my color theme & Christmas decor is so totally different from anything else I have done before & wonder of all wonders I actually got myself organised enough to take photos of my creative process.

Here is no. 3: (Scandinavian style)

#3 cork reindeer!


Supplies:
  • A selection of wine bottle corks
  • Twigs
  • Gold ribbon
  • Toothpicks
  • Hot glue
  • Sparkly dot for the nose
  • Sharp scissors
  • Gold twine
  • Stapler

  • Snip the twigs into x4 pieces to be used as legs
  • Snip the twigs into x2 antler shapes
  • Cut some of the corks in half to be used as heads
  • Using a tooth pick, secure the head to the body
  • Push twig legs into the underside of the body cork
  • Using hot glue, push the antlers & tail into the correct positions
  • Tie gold ribbon around the reindeers neck
  • Stick the nose onto the head
  • Tie a gold twine loop for hanging & staple to the back of the head
  • Slip them onto your twig tree adding a sophisticated pop of black.
    Remember to visit tomorrow for another tutorial.

    So glad you stopped by!

    Merry Christmas to you all!

Friday, December 19, 2014

Handmade tree Ornaments #2- Straw diamonds.

Welcome back from my next Christmas ornament tutorial.

As I mentioned the other day...I decided to make all my tree ornaments this year because my color theme & Christmas decor is so totally different from anything else I have done before & wonder of all wonders I actually got myself organised enough to take photos of my creative process.

Here is no. 2: (Scandinavian style)

#2 straw diamonds!


Our tree.....not quite finished yet...but almost there :D

Supplies:
  • Black plastic drinking straws
  • Strong twine or yarn of some kind
  • Embroidery needle
  • Sharp scissors

  • Snip the straws into x9 pieces to your preferred length
  • Using a single piece of yarn, thread x3 pieces of straw & position into a triangle shape
  • Secure at the point where the straws meet
  • Add another x2 straws making x2 triangles
  • Repeat the process until you can make a mini pyramid shape
  • Tie off the yard at the apex leaving long threads loose
  • Using another piece of yard, add triangles to the bottom of the shape creating a diamond
  • Once completed,, tie off yarn securely
  • Knot the loose threads at the apex to create a loop
  • Your diamond is ready to hang

Slip them onto your twig tree adding a sophisticated pop of black.
Remember to visit tomorrow for another tutorial.

So glad you stopped by!

Merry Christmas to you all!

Wednesday, December 17, 2014

Handmade tree Ornaments #1- Mini pom-poms.

I love this time of year!

Happy, craft filled days, hand making tree ornaments & gifts. This year I actually took photos of my process for many of the craft projects, wonder of all wonders! Mostly because my color theme & Christmas decor is so totally different from anything else I have done before.

I will be posting tutorials for how I made them over the next week or so, so make sure to stop by my blog for all the details.

#1 mini, yarn pom-poms!

This is our almost completed tree.....follow the journey!

Supplies:
  • Plastic picnic fork
  • Medium weight knitting yarn
  • Embroidery scissors 


  • Thread a loose piece of yarn through the middle of the fork.
  • Wind thread around the middle of the fork until at least an inch thick.
  • Using the loose piece of yarn in the middle, tie securely through the middle.
  • Slip the whole yarn bundle off the fork.
  • Slip the loops either side to release the pile of the pom-pom.
  • Tie a loop at the top for hanging.
Slip them onto your twig tree adding a gorgeous splash of color!
Remember to visit tomorrow for another tutorial.

So glad you stopped by!

Merry Christmas to you all!