Showing posts with label DT. Show all posts

Monday, December 11, 2017

Day 11 of the 12 Days of Giving Blog Hop. Window cut file.

12 DAYS BLOG HOP - WEBSITE-01
Hello.  Welcome to Day 11 of Hip Kit Club 12 Days of Giving Blog Hop. Today we are giving you this gorgeous Window cut file designed by Elsie Robinson.

GIVING 2017 - DAY 11

Please follow this link back to the Hip Kit Club website.  Login to your account & look for the ‘downloads’ tab.  You will find a subheading ’12 Days of Giving’, where you will find all of our 12 Days of Giveaways.  Please download them & enjoy!  
Happy Holidays from all of us here at Hip Kit Club.

This is my contribution to this blog hop using this gorgeous cut file.  It uses our November 2017 Hip Kits perfect for Christmas projects.

Here is a sneak peek of Elsie's layout.  Follow this link to her blog to see the entire project.

Insert Elsie's sneak>>

Here is my page! 


KJ DT graphic

We hope you will hop along, and enjoy this free cut file!  Please share what you create in our Facebook Member Forum!

Have a great week!
~Kim

Friday, July 21, 2017

Scrapbook SUMMER~ Inspiration!


The April kits from Hip Kit Club were so inspiring & had all the elements needed to capture the start of a gorgeous summer!! 

Love this Place by Kim Watson


Happy Weekend by Kim Watson


https://youtu.be/sVU0C8Q-Ahc

Find Peace & Sunshine by Kim Watson 


https://youtu.be/p3vo7VcNBDQ 

Sea, Sun & Soul by Kim Watson


https://youtu.be/_TG0EM3xUAc

The Best Beach Day by Kim Watson


There are a few April kits still available...do yourself a favor & grab one whilst you can!

BONUS!


Monday, April 24, 2017

Celebrate with glitter & glam with Queen & Co

Hi everyone! Kim Watson here with some of my latest projects to share that focus on the lush Queen & Co glitter washi tapes & regular wash tapes. Let me walk you through my processes.

Friend by Kim Watson


Not having any 12 x 12 paper, I created my own using x4 6x6 sheets from the NEW Delightful dots & Stripes paper pads. The color blocked effect is so visually striking and the perfect canvas for my page.


Using black & white bakers twine, I adhered a circle shape onto the background page to ground the design. It is from this circle that everything else radiates. Clusters of flowers made up of Iridescent flowers, Pom flowers & die cut flowers using the Flowers shaker kit. Leaves made from collaged washi tape then die cut, Buttons, Pinwheels & Lollies. The result is a pretty & highly dimensional floral bouquet.


Two strips of washi tape on the top right corner, helps with visual balance, and again a sweet, floral cluster adds tons of interest. To fancy up the washi circle, I added a few little items from our new Bling collection: Lollies, Iridescent pearls, Pinwheels, Petite Posies & Rivets. This helps the eye travel around the circle to different parts of the page.


19 Card by Kim Watson


Beginning with the Candle Shaker card kit, I filled the different candles with Metallic Pearlies, then sealed the shakers with Metallic washi tape, even the flames got the same treatment. The black card front creates fabulous drama, offsetting the gorgeous & sophisticated color palette of Black, Magenta, Silver & Gold. Iridescent flowers, Pom flowers, Lollies, Petite Posies & Wallflowers add glam & twinkle.


21 Card by Kim Watson


This card is a real event...fitting for a 21st birthday, being a big milestone birthday. I started with the white card base, adding a black panel & magenta Delightful dot patterned paper panel. I then created the 3 tiered cake accent. Remember by collaging strips of washi tape onto a piece of cardstock, you make it more manageable when creating an accent like this one. Once layered & adhered together, I made a cute little bow tie from black & white dotted washi tape. Pinwheels add the necessary bling to the top tier.
Using jewellers wire, I made 4 wobblers to 'jump out' of the cake...an Iridescent flower, punched stars glammed up with Sequins & Pearlies and a gold glitter number 21 really make a 'wow!' statement. Bunched up tissue paper into the top of the cake was the perfect way to hide any workings within the cake :)
I LOVED this months assignments, & I hope you do too? Sigh...so many Queen & Co pretties and only so many hours in a day to craft! Aren't you just loving the new lines? Well if you are & want to purchase some for yourself, the items I used are listed & linked below.
_________________________________________
Thanks for stopping by today & have yourself an awesome week!
~ Kim`

Wednesday, April 19, 2017

Washi Tape ideas you are going to love!

Hi everyone! Kim Watson here with my latest Queen & Co projects to share with you. This month the focus is the lush Queen & Co glitter washi tapes & regular washi tapes. I can't wait to show you what I came up with.

Celebrate Card by Kim Watson
Having my Father's 70th birthday this week, was cause enough for me to create something especially geared towards a guy. Knowing he wouldn't appreciate pastel colors, I selected the blue, gold & silver glitter tapes to decorate my Star Shaker card kit. Laying the tapes diagonally across the card really makes the most of the stripe effect, I especially love how by leaving gaps at regular intervals between the tapes, allowed me to stamp 'CONGRATULATIONS' sentiments, adding to the interest & texture to the card.
Filling the stars was tricky initially because I just couldn't settle on what color would look best to fill the shakers. I decided on the best of both & used both gold and silver, the effect is masculine with a hint of sparkle.
Lastly I die cut a title in black cardstock & stamped a happy Birthday sentiment (from Fiskars USA). The extra contrast is what exactly what I needed to finish off the card.


Just Saying Hello Card by Kim Watson

Beginning with the Windows Shaker card kit, I filled the different quadrants with Metallic Pearlies & Sequins, then using watercolor paper, created a pretty gradient color wash making sure to match the topping colors in each window.


The black cardstock surround with the white windows are the perfect canvas to show off my layered, black, patterned washi tape & sentiment tabs. A stamped flower (from Scrapbook & Cards Today magazine) painted in vibrant colors, is the perfect embellishment for such a striking card!

Now & Forever Card by Kim Watson

This card is a real event...fitting for my brother's up & coming wedding. I started with the white card base, adding a gorgeous floral cut file for some fancy, understated texture. I then collaged strips of glitter washi tape onto a piece of cardstock, making it more manageable to punch out an entire family of gorgeous shimmery butterflies.


Arranged around the card with lilac, Iridescent Pearls & an appropriate sentiment stamp from Paper Smooches, the effect is breathtakingly glamorous!!

Best Wishes Card by Kim Watson


Beginning with the Candles Shaker card kit, I filled the candles quadrants with pastel Metallic Pearlies, then using striped washi tape, covered the candles before adhering the card onto the back.The flames were filled with tiny diamonds & covered with silver metallic washi tape making them all sparkly & fun!


The front was decorated with Iridescent flowers & Pom flowers and other colorful bling bits. A sweet sentiment stamp from Paper Smooches in the form of a little flag creates a great focal point but it is the turquoise bakers twine adhered around the edge of the card that gives the card the finishing touch.

Another month of gorgeous assignments, & I really hope you like them as much as I do. Once again Queen & Co pretties make my job of designing so easy! Be sure to use the linked list below, to grab some of the supplies I used yourself.
Have a fun, craft filled day further!

Tuesday, April 11, 2017

Washi tape Feathers

Sometimes do you find you look at your stash & think...ugh! I really don't have the right embellishment, right?!

I do that all the time.
Until that is I joined the Queen & Co Design Team
I was forced to stop being lazy & think out of the box a little to create embellishments and accents, whilst making the most of their gorgeous products!

This card is the result of one of those light bulb moments!

A Note of Thanks by Kim Watson


  • Gesso a white card
  • Add yellow & gold Shimmerz
  • Splatter with charcoal Shimmerz
  • Machine with zigzag stitching
  • Punch a vellum pinked circle
  • Layer washi tape & a stamped sentiment in a little cluster
  • Collage pink & yellow washi tape on a cardstock base & die cut feathers from MFT Stamps
  • Add buttons & bling bits


I am stoked with the result. A gorgeous card requiring very few supplies...I urge you to try one too.

Thanks for visiting!


Monday, April 10, 2017

Ombre watercolor effect for your cards!


Thanks for joining me on the blog today friends! I have some ideas to share that I hope you are going to love!
Ok, so do you love making cards? Yes, I do!
Do you have friends & family you love give cards to? Yes, I do?
Do you feel like playing with paper right now? Yes, I do?
(Then I think we are on the same page hehe!)
Here are some cards that will add a whole lot of color to someone’s life, using the uber fun, Joy Parade collection from Fancy pants Designs AND gorgeous bling & flowers from Queen & Co. 

Create an ombre effect with complimenting watercolors like I did on these few examples. 

Hello Friend card by Kim Watson


  • Add some bold swashes of watercolor for the background.
  • Punch a vellum scalloped circle.
  • Decorate with flowers & leaves.
  • Adhere little bling accents in ombre colors to match the background.
  • Punch a cute sentiment.
 Celebrate #lifeisajoyparade card by Kim Watson


  • Add some bold swashes of watercolor for the background.
  • Punch a sweet butterfly then paint it in bright colors.
  • Adhere puffy sticker dots in ombre colors to match the background.
  • Attach a cute sentiment from the Ephemera pack

Make a Wish card by Kim Watson


  • Punch an assortment of butterflies from left over scraps.
  • Arrange them in an ombre fashion.
  • Splatter background with ink colors to compliment butterfly colors.
  • Once dry, attach butterflies & sentiment from the Ephemera pack.
Eat Cake by Kim Watson


  • Cut a selection of paper strips, attach adhesive tape on the back.
  • Lay the strips in a pleasing patchwork arrangement, trim off extra.
  • Paint a cupcake Ephemera piece & allow to dry.
  • Attach accent to card with foam tape & a little bunched pile of thread.
  • Decorate with puffy stickers & a sentiment.
Trio of Cards  by Kim Watson


All done…four rainbow inspired cards, sure to bring joy to anyone who receives them. I hope you have enjoyed them. If you are curious how I created the backgrounds, be sure to take a look at my Youtube channel.

Thanks for visiting! 


Sunday, April 09, 2017

See me in this issue + get your entries in!!


Yay! I am proud to share that this AMAZING #proudlysouthafrican magazine,
Scrap Affairs, is now on the shelves...not only here in SA but in Australia too. They have gone from strength to strength over the last year & I am so proud to be published in it. 
Congrats to Candice & her team!


Celebrate Friendship by Kim Watson 


White, is the new black, right? Take a look at this project that uses white & neutrals with gorgeous effect. The #january2017 Hip Kit Club kits were fabulous to work with...they just never seemed to end..so I had a ton of pretty#hipkitexclusivesproducts to use for this page. 

Clusters of pretty flowers, a combination of fussy cut flowers from Kimberly Krater Hutchison's paper & ephemera pack, cork from 1canoe2 for American Crafts & graphic flowers & leaves from a #freesubscriber printable I designed to coordinate with the January kits. 

Placed in a triangle formation, gives the page balance & interest drawing attention to the photo & journaling. Talking about journaling, because I needed more space for writing, I created a patterned paper panel under the photograph, then typed straight onto the vellum. It allows one to clearly read the journaling, as well as allowing the dotted pattern to show through. 

Lastly tiny white butterflies placed diagonally across the page are what was needed to draw everything together. I hope you like this idea...? Be sure leave a comment & let me know what you think.

Scrap Affairs sketch Contest by Kim Watson


This the sketch contest I designed for Scrap Affairs. You will find all the details in this issue. Remember you have an opportunity to get your page published, so it is so really worth entering. I look forward to seeing what you create! 
Happy days crafty friends!

Hugs


Saturday, April 08, 2017

Lovely in Lilac with Queen & Co.

Good morning friend...I hope you have a cuppa & are ready for some new inspiration?
For todays card I decided on a purple & lavender color scheme. Isn't it pretty?? The combination of purple papers from the Delightful Dots paper stack & lavender & lilac pretty bits from Queen & Co, make crafting handmade cards so worth it. 
Happy for You by Kim Watson


A watercolor wash on the base card grounds things nicely, on top of which I placed the flower shaker. I selected a variety of purple colored, coordinating items, then filled the shaker & decorated the card. The beauty of Queen & Co products is that as different they are all, they work so well with each other to create the most gorgeous beautiful projects
The result is a fancy, sophisticated card with loads of bling appeal.  
I appreciate you joining me today!
Have a super crafty day!
~Kim

Thursday, April 06, 2017

Pretty layers with Pink Paislee!

Oh my crafty heart…don’t you just LOVE these colors?
The December Hip Kits are to-die-for! The wait was well worth it! Paige Evan’s collection, Take Me Away for Pink Paislee, is pretty, artsy & so easy to scrap with. Take a look at what I did.
Hello Life by Kim Watson
kimwatsonhellolifehkc01
Using an exclusive paper by Kimberly Hutchinson, I applied layers of misty fuschia inks from Shimmerz, building up intensity as I went along. Bold splatters finished off things nicely giving a super pop of color!
kimwatsonhellolifehkc02
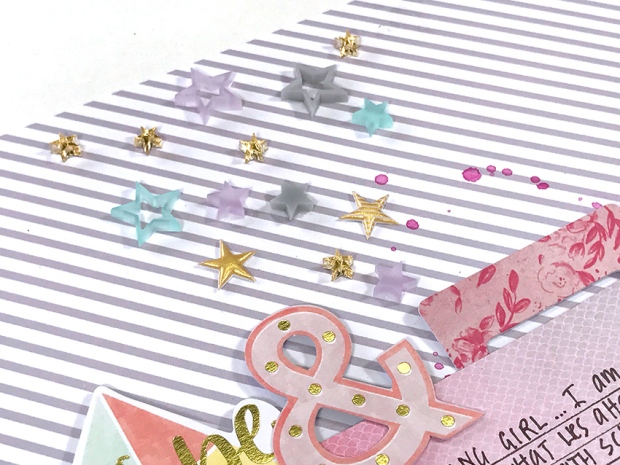
Aren’t those exclusive resin stars darlin’? They were calling to be scattered across the page somewhere…just like the dreams & possibilities that lie ahead for the girls, as they make big decisions about careers & what to study at uni.
kimwatsonhellolifehkc03
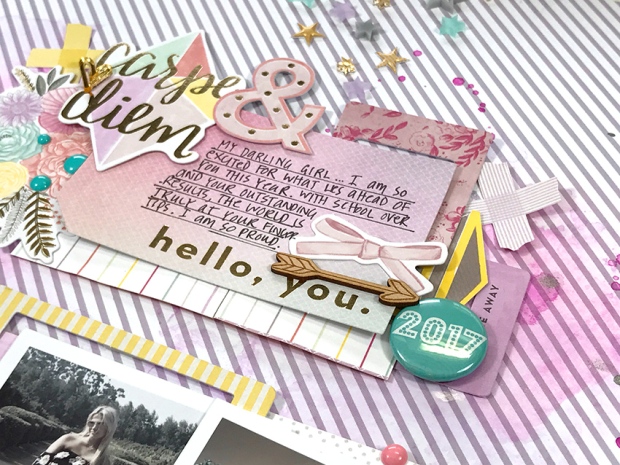
Pretty layers using ‘Take Me Away’ papers & ephemera. The Hip Kit exclusives add lovely texture & interest.
kimwatsonhellolifehkc04
I used the gorgeous MME mirrored acrylic die cut numbers to attach the cute tassel, allowing it to dangle free.
kimwatsonhellolifehkc05
I adore how the mix of MME mirrored acrylic die cut & charcoal glitter thickers, layered on top of a floral ephemera piece make the most gorgeous title. It is pretty & sophisticated with a touch of whimsy.
Process Video of Hello Life by Kim Watson
The December Hip Kits are totally fabulous…if you haven’t grabbed one for yourself, I suggest you do. Treat yourself whilst there are a few left to buy.
You are going to LOVE them.
kj-dt-graphic