Showing posts with label Evalicious. Show all posts

Wednesday, September 02, 2015

Four ways to add laughter to a project!

Happy Wednesday friends!! I hope you are having a wonderful week so far!
Today I am sharing my last May Hip Kits club project with you. I wanted to make sure I have posted all my May projects so I can start posting my projects from the gorgeous June kits & add-ons.
Laugh Everyday by Kim Watson
@HipKitClub @KimWatson @shop.evalicious @pinkpaislee @americancrafts #hipkitclub #scrapbooking #layout Wanting to emphasise the feeling of joy on my layout, as I mentioned in my journaling…I settled on the words “Ha-Ha-Ha-Ha!”, using them in a few ways.
  1. Die-cut them out of vellum paper & then used the negative space paper as a mat under the photo.
  2. The die-cut “Ha-ha’s” were also used as part of secondary titles, scattered around the page.
  3. Using the uber cute striped alphas as seen in the May project life kit, I added more “Ha-ha’s” to the vellum title clusters.
  4. I hand-cut the title ‘Laugh’ in black cardstock, creating a fabulous focal point!
This page has so much ‘Happy’ going on LOL!
@HipKitClub @KimWatson @shop.evalicious @pinkpaislee @americancrafts #hipkitclub #scrapbooking #layout @HipKitClub @KimWatson @shop.evalicious @pinkpaislee @americancrafts #hipkitclub #scrapbooking #layout @HipKitClub @KimWatson @shop.evalicious @pinkpaislee @americancrafts #hipkitclub #scrapbooking #layout For the main title, I hand-cut the letters as neatly as I could in black cardstock. Ironically, it is the imperfections in the wobbly letters that make them so cool. So if you are going to try this…relax…sketch them out loosely on the reverse side of the cardstock before-hand & let the scissors do all the work. It is so much fun!!
@HipKitClub @KimWatson @shop.evalicious @pinkpaislee @americancrafts #hipkitclub #scrapbooking #layout After looking at the page again, I am convinced my inked wood veneer sentiment from Evalicious is the best part of the page. The x2 tone colors…make me seriously happy, & placed on top of the black title…what’s not to 💗
I appreciate you stopping by the blog to take a look at my page. I hope you have found it inspirational. Remember to stop by the Hip Kit Club Member Forum to grab our monthly FREE cut-files, as well as hang out with some great crafty gals.

Monday, August 31, 2015

How to create a washi tape flower!

Hello friends,Kim here!
Who doesn’t have great photos & memories of happy times with friends…? Today I am sharing a page about just that…colorful memories that mean a lot to me & what better way to do that than with the gorgeous May Hip kit & add-ons!
Awesome, Happy Day by Kim Watson
@HipKitClub @KimWatson @chickaniddy @americancrafts @rangerink @pinkpaislee @xyroninc  #scrapbooking #layout #12x12
The packs of loose embellishments included in theMay Embellishment kit from Pink Paislee & Evalicious were fabulous for creating little embellishment clusters. I used three clusters when designing my page layout, creating wonderful balance within my visual triangle.
@HipKitClub @KimWatson @chickaniddy @americancrafts @rangerink @pinkpaislee @xyroninc  #scrapbooking #layout Inspired by the gorgeous American Craft’s washi tape booklet included in the May Embellishment kit, I decided to make a handmade flower.
How I did it:
  1. Cut a variety of washi tape strips from the booklet.
  2. Cut the strips into x12 shortened pieces to make the petals.
  3. Cut x3 patterned paper circles, the biggest at the bottom. Allowing a little of each pattern to peek out created a lovely layering, interesting centre for your flower.
  4. Attach the petals on the back of the layered centre…and you are all done.
@HipKitClub @KimWatson @chickaniddy @americancrafts @rangerink @pinkpaislee @xyroninc  #scrapbooking #layout Using the stencils & paint from the May Color Kit I added subtle texture & color interest around the page. Red splatters are a wonderful way to add bright areas of color.
@HipKitClub @KimWatson @chickaniddy @americancrafts @rangerink @pinkpaislee @xyroninc  #scrapbooking #layout Next add journaling to one of Evalicious’s journal cards. I always buy the Project Life kit, even thought I don’t actually do any project life. The journal cards are so fabulous as well as the smaller packs of embellishments. They really add something a little special to my projects.
@HipKitClub @KimWatson @chickaniddy @americancrafts @rangerink @pinkpaislee @xyroninc  #scrapbooking #layout
Once again I have enjoyed sharing my project with you. I hope it has inspired you in some way to try something new. If you are interested in securing a July kit & add-ons…make sure you have your order in so not to be disappointed. You are going to LOVE everything about it.
Have a wonderful week!!

Wednesday, August 19, 2015

Scrapping with layers + yellow alert!

I hope where ever you find yourself, that you are having the BEST time?! Here are some of my projects using the May Hip kit & add-ons. I am really enjoying the vibrant patterned papers & embellishment combinations!!
This week I thought I’d focus on the gorgeous Pink Paislee goodies from the #citrusbliss collection included in the kits.
Life is Sweet by Kim Watson 
@HipKitClub @KimWatson @pinkpaislee #ppcitrusbliss #scrapbooking #12x12 #layout  @shopEvalicious
These photos are from a few years back, I find scrapbooking older photos as well as current ones, refreshing & keeps my albums fresh & interesting.
@HipKitClub @KimWatson @pinkpaislee #ppcitrusbliss #scrapbooking #12x12 #layout  @shopEvaliciousIt was the citrus slices paper that sparked the idea of using circles in this design, which in turn sparked the idea of using some of the citrus cut-outs to make flowers. They add great 3D interest to my circle clusters.
@HipKitClub @KimWatson @pinkpaislee #ppcitrusbliss #scrapbooking #12x12 #layout  @shopEvaliciousThe cute stamp set from the May Color Kit & stencil…were a fantastic way to add subtle texture to my page. I layered the stamped images in soft colors around the page making sure to keep them understated, not to distract attention away from the focal areas.
@HipKitClub @KimWatson @pinkpaislee #ppcitrusbliss #scrapbooking #12x12 #layout  @shopEvalicious
As usual Evalicious’s wood veneer sentiments are adorable & fabulous on any page. For added color accent, I painted ‘Life is Sweet’ with lime green & magenta with stunning results. It really draws attention of the page. 
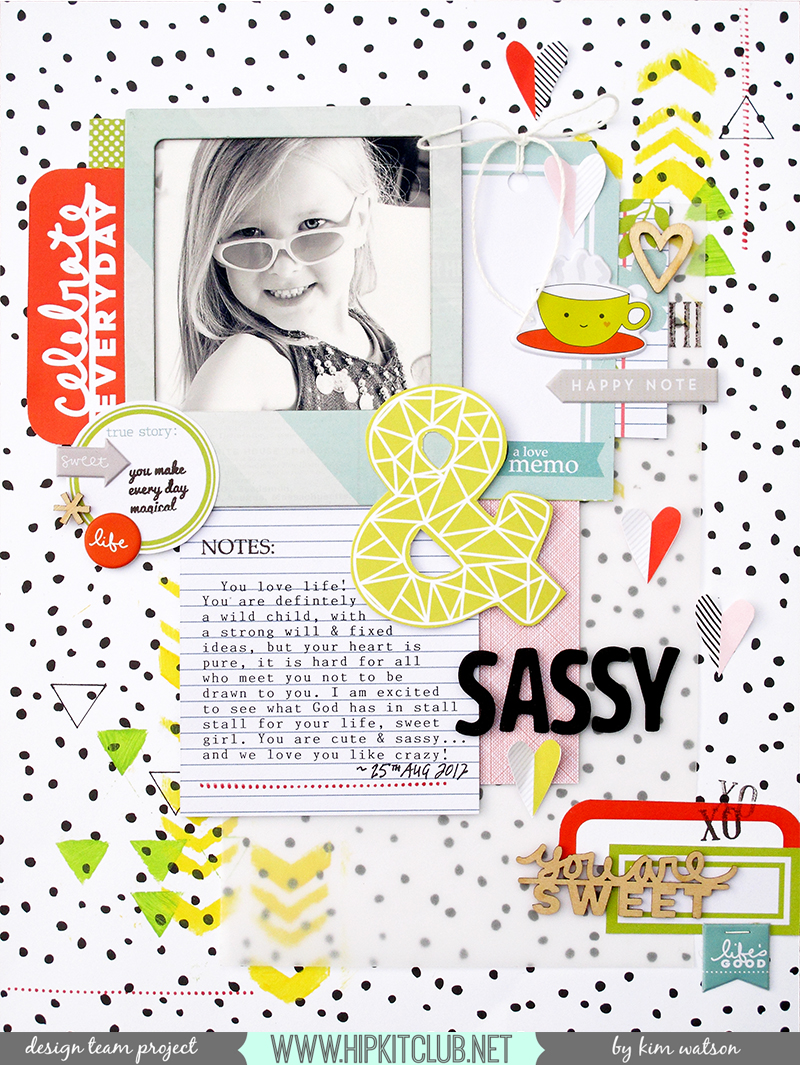
For this page, wanted a more graphic feel page with pops of bright colors on a neutral black & white spotted background!
Sweet & Sassy by Kim Watson
@HipKitClub @KimWatson @americancrafts @shopEvalicious @chickaniddy #scrapbookingkit #summercraft #layout #papercraft
I am so thrilled with how this page turned out. I am generally nervous about mixed media, not wanting to mess my page up with my clumsy attempts at adding paint & ink but this time it actually worked. I think the smaller stencils in the Color Kit teamed with daubers is what did the trick & I love how the mixed media looked under the vellum layer.
@HipKitClub @KimWatson @americancrafts @shopEvalicious @chickaniddy #scrapbookingkit #summercraft #layout #papercraft Making the most of the May Color Kit & stencils…I started by adding painted texture to my page, layering the stencils using the yellow & green paint daubers, I added both solid colors & doodled outlines.
@HipKitClub @KimWatson @americancrafts @shopEvalicious @chickaniddy #scrapbookingkit #summercraft #layout #papercraft
I then created interesting, layered clusters around the page. Trimming down the red Evalicious journal card made a fabulous sentiment tag. As did her cute puffy stickers layered onto a circle label with a tiny stamped sentiment. The stamp set which has loads of very small sentiments & accents words comes in the May Color Kit too. I am finding them perfect for a reluctant stamper like myself. They add super texture & interest to the page
@HipKitClub @KimWatson @americancrafts @shopEvalicious @chickaniddy #scrapbookingkit #summercraft #layout #papercraft The rest of the journal card became a label, layered with green one, a wood veneer accent & stamped images,  I created a pretty cluster in the bottom right corner too.
@HipKitClub @KimWatson @americancrafts @shopEvalicious @chickaniddy #scrapbookingkit #summercraft #layout #papercraft Using my trusty typewriter, I journaled onto a piece of  trimmed Chickaniddy paper, stamped with a few images to make it more interesting.
Yet more evidence of an amazingly well planned & thought out kit from Hip Kits. The perfect mixture of patterned papers, accents & embellishments, make designing scrapbook pages a breeze. Make sure to secure your June kits, & July kits. they are almost sold out.
Glad you stopped by!!

Friday, July 31, 2015

Scrapping birthdays + a new layout!

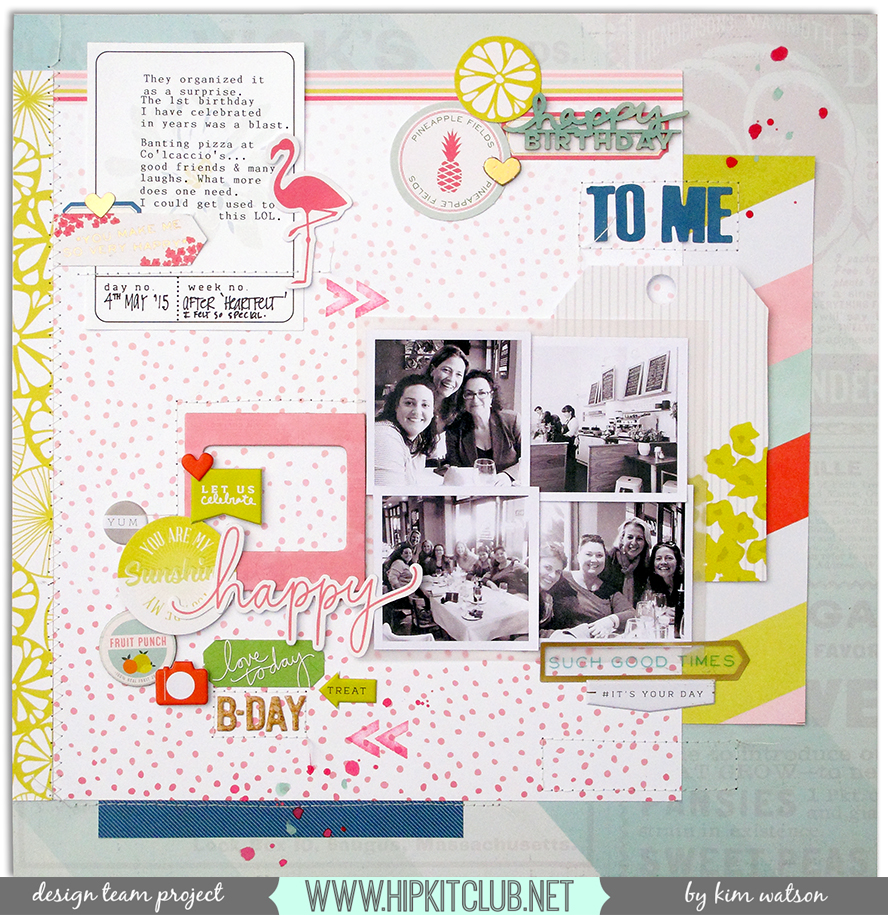
Hi Kim here. Today I am excited to share a page using the fabulous May Hip kits. The citrus colors are so fresh & funky. I really enjoyed the paper & embellishment combinations!!
Happy Birthday to Me by Kim Watson 
@HipKitClub @KimWatson @shopEvalicious @pinkpaislee @americancrafts  #hipkitclub #may2015 #layout #12x12 #scrapbooking I love using patterned paper as a background for most of my layouts which means I end up mixing a few designs on one page.  The coordinating patterned papers from the Hip Kits May Main Kit make doing that so easy. I was particularly drawn to the vibrant striped paper & ended up using it to determine my over color palette. KimWatson+Happy Birthday+HKblog02
I have some rather grainy photos from my surprise birthday lunch that I really wanted to scrap…so chose this layout that uses x4 smaller sized photos. Making them black & white with high contrast, crisped them up nicely.
KimWatson+Happy Birthday+HKblog03The wood veneer embellishments from Shop Evalicious are so cute…but I needed a color accent in this top corner. Paint did the trick..a little dauber from the May Hip Color Kit did the trick. I love how it turned out.
KimWatson+Happy Birthday+HKblog04Then came the extra fun part…the cluster on the left of the photos. I mean really, how does one choose which of the cute embellishments to use, the main kit & the embellishment add-on kit are bursting with options. I settled on items from the amazing Pink Paislee pack & Evalcious stickers which always rock my world. I mean…check out the vibrant colors?!
KimWatson+Happy Birthday+HKblog05
Then came the journaling… easy-peasy when you have a pile of cards from the Hip Kits May Project Life Kit by the ever talented Evalicious & a typewriter. I love the quality & finish of them….they give the page such a classy feel.
I hope this page has been inspiring. Have a wonderful weekend!

Monday, April 20, 2015

New layouts + NSD crop ALERT!!

CRAFTY UPDATE!
Have you heard Hip Kit Club is having a crop the weekend of the 1st-3rd May?
NB: You have to join the FB group HERE>> to participate. 

NDS Crop Graphic

Also...I have two pages to share with you today, using my Hip Kit Club March 2015 kit. Yippee!!!Is it just me or are these kits just gorgeous?! I am totally crushing on the colors & wonderful mixture of accents & papers…sigh! Ok…ok I’ll stop gushing now & get to my projects.
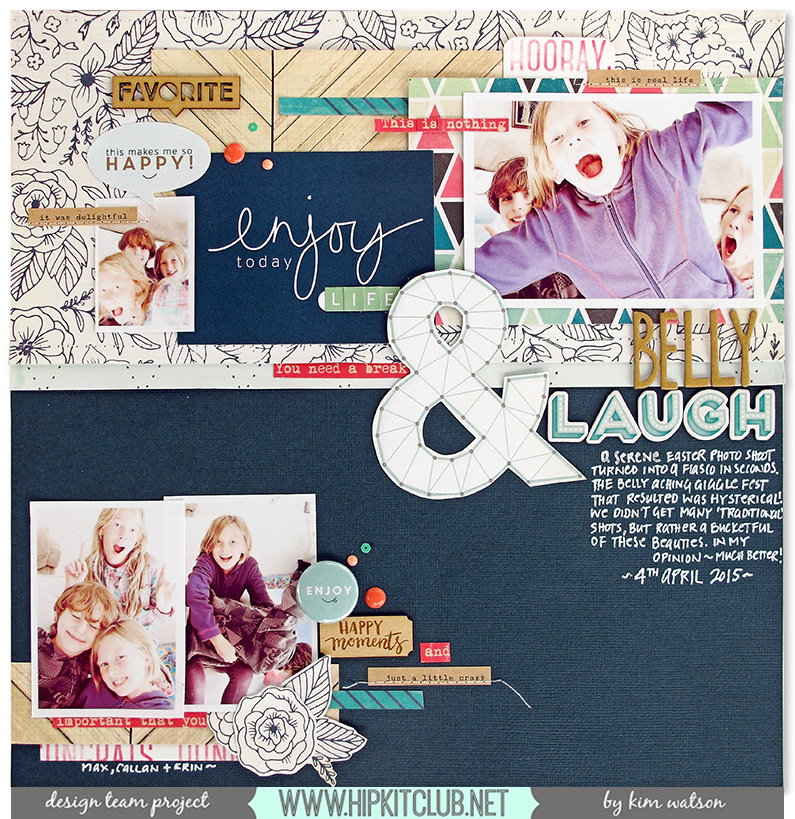
Enjoy Life & Belly Laugh by Kim Watson
@HipKitClub @KimWatson #march2015 #scrapbookingkit #hipkitclub @crate_paper
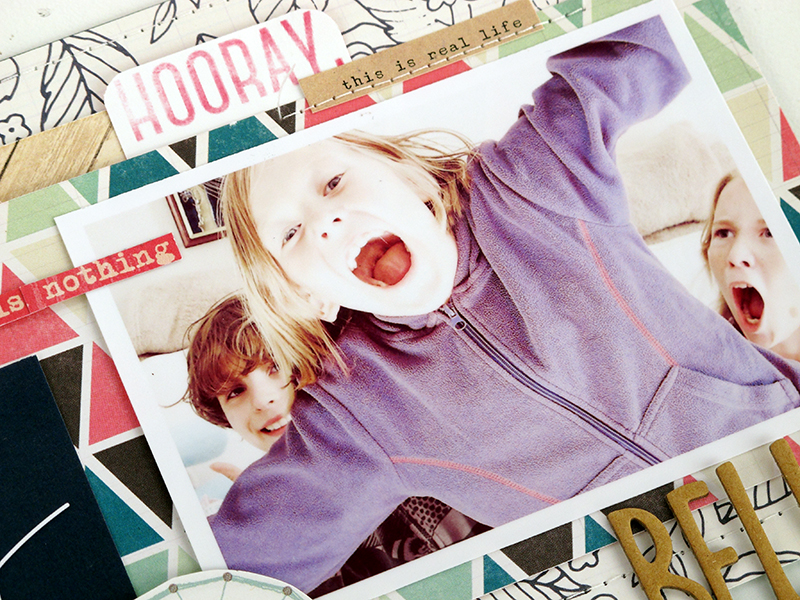
When planning this page I started with the photographs. They are from our Easter day photoshoot that went a little off topic rather quickly. The kids were so charged on sugar that sitting still just wasn’t on the cards, so I went with it & the results are epic. We all had a blast…and the results are seriously scrap-worthy. I love each & every blurry photobomb & insane pic; they are real… real life. LOL!
Kim Watson+Enjoy Life+HK02
For MORE details of this page check out my blog post on the Hip Kit blog HERE>>>
And another one from the March kit.
I know many of you have used up your March kits & are working with your April kits & Add-on’s. Do not fear…I created this page so it could be lifted easily using any of the beautiful Hip kits. Cardstock as a base is so versatile.
Dear Life by Kim Watson
@HipKitClub @KimWatson @crate_paper #hipkitclub #scrapbooking #layout #12x12
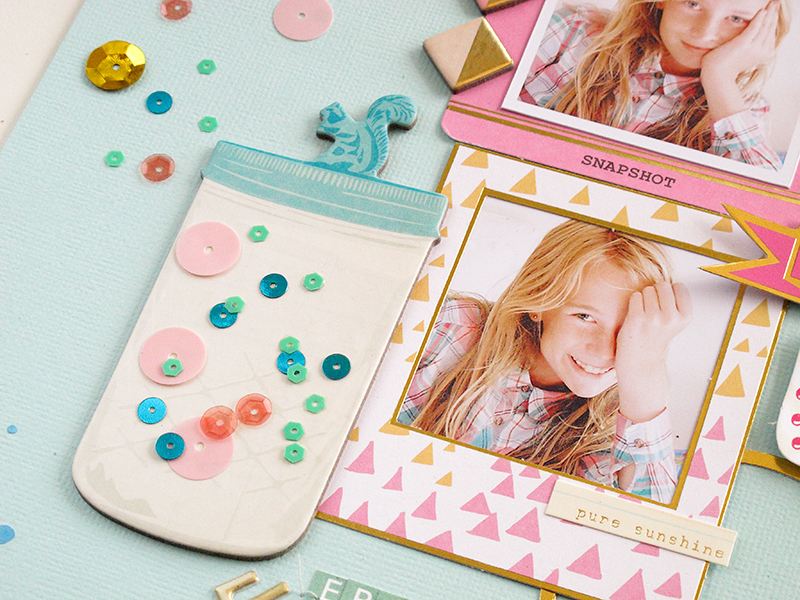
What is it about pastel colors & gold accents that make one feel like smiling?
Kim Watson+Dear Life+HPK05 blog
Have you thought of filling the pretty chipboard jar with sequins? I love how it adds a touch of girliness to the page.
For MORE details of this page check out my blog post on the Hip Kit blog HERE>>>
I am so happy you stopped by...have a wonderful day!

Thursday, April 09, 2015

Mini Brag Book + inside pages

I have a mini book to share, as seen on the Hip Kit Club blog a few weeks ago! 
My Mom loves to brag about her kids & grandkids. Visitors pop around for tea & out come the albums & mini books. Knowing this gives me a legit excuse to make mini brag books regularly, particularly because they are quick & so rewarding to make. I make sure, when I design them I don’t add too much journaling, knowing how much my Mom & her sweet friends love to chat,  it leaves conversation space for my Mom to fill in the details.
Mini Brag Book by Kim Watson
@HipKitClub @KimWatson #hipkitclub @crate_paper #minibook
This is how you can make one for yourself.
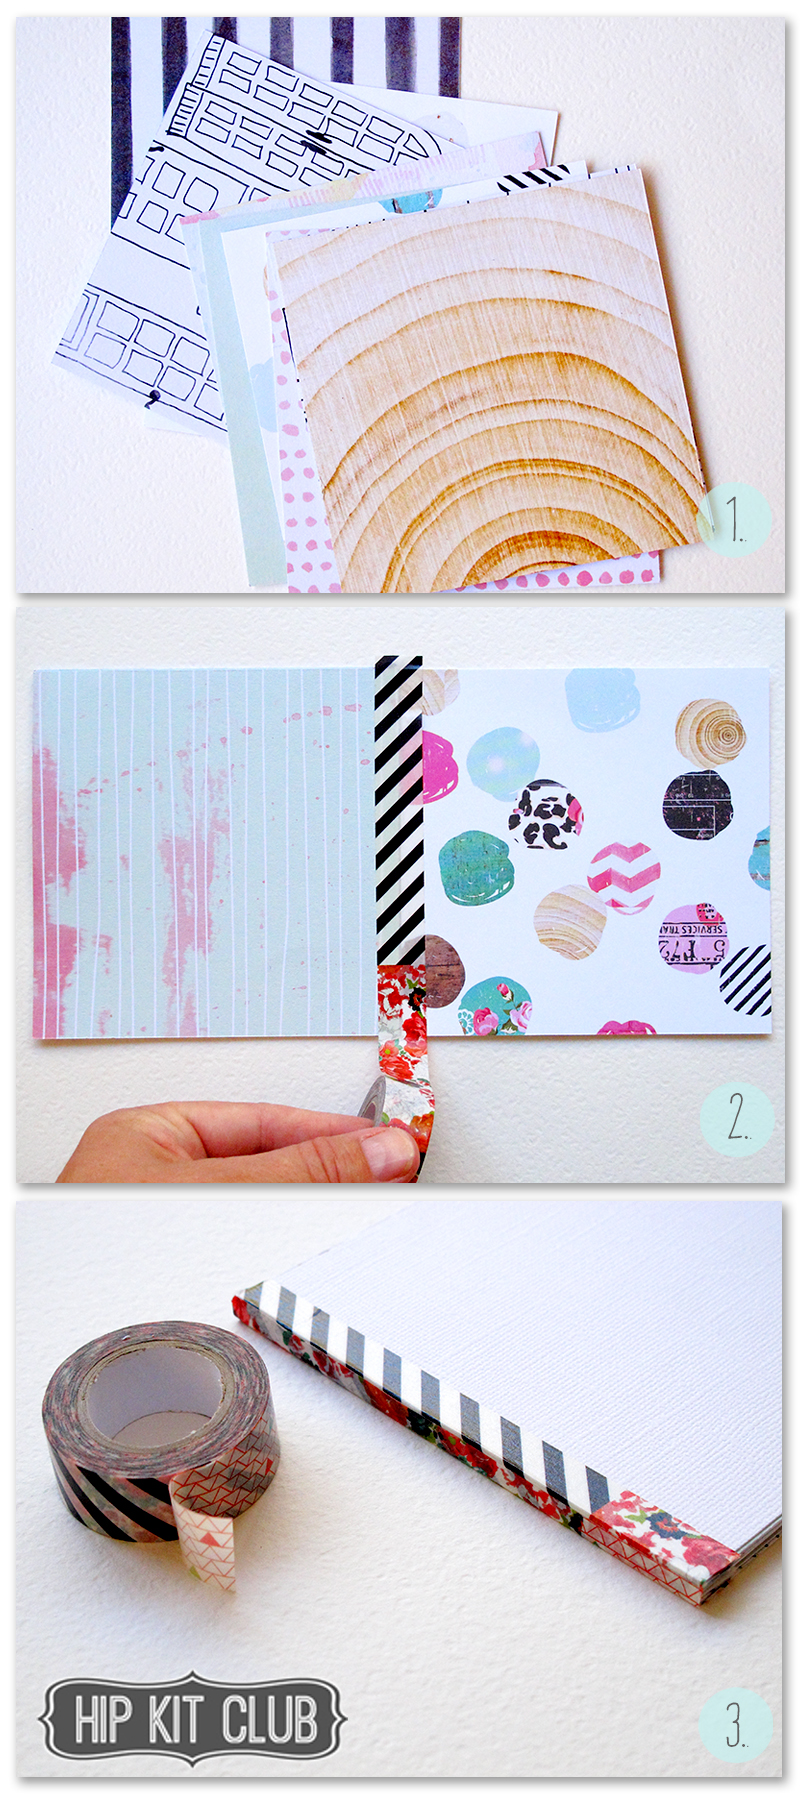
Instructions:
  1. Using the gorgeous February kit, grab yourself a selection of pretty patterned papers, the American Crafts foam alpha sheet, enamel dots, ephemera die-cuts & gold rub-ons from My Mind’s Eye.
  2. Cut pages for your mini book 4.5″x4.5″.
  3. Using Heidi Swapp washi tape, join the pages together
  4. Once you have the desired amount of pages, attach x2 white cardstock covers to the outer pages for strength.
  5. Bind the whole book together with a couple of layers of washi tape. The beauty of Heidi Swapp washi tape, is that it has a variety of patterns in one roll which makes for super interesting detail on the book spine.
  6. Finally bind bakers twine around the middle pages of the book, tying on the outside.
  7. Let’s fill those pages!!
@HipKitClub @KimWatson #hipkitclub @crate_paper #minibook
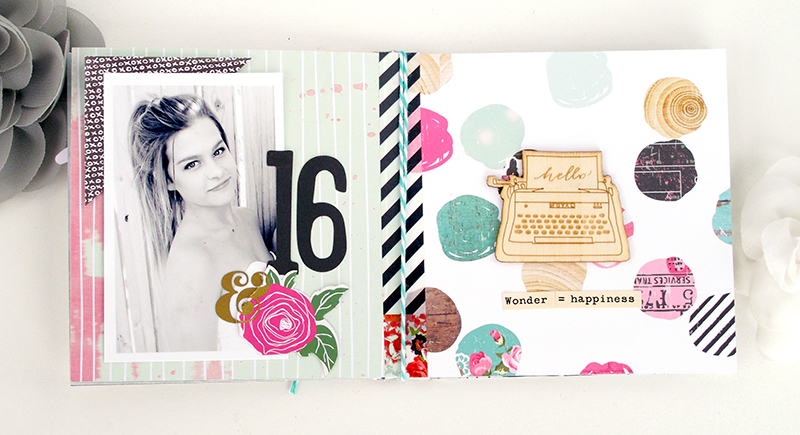
Pages 1 & 2:
@HipKitClub @KimWatson #hipkitclub #minibook
Pages 3 & 4:
@HipKitClub @KimWatson #hipkitclub #minibook
Pages 5 & 6:
@HipKitClub @KimWatson #hipkitclub #minibook
Pages 7 & 8:
@HipKitClub @KimWatson #hipkitclub #minibook
Pages 9 & 10:
@HipKitClub @KimWatson #hipkitclub #minibook
Pages 11 & 12:
@HipKitClub @KimWatson #hipkitclub #minibook
Pages 13 & 14:
@HipKitClub @KimWatson #hipkitclub #minibook
Cover: 
KimWatson+MiniBragBook+02HK
Thanks for stopping by today, I hope you have found this mini book inspiring!!
If you haven’t had a chance to purchase your February, March, & April kits yet, then don’t miss out!  They are packed full of a beautiful,  well co-ordinated selection of products, you will LOVE!
Visit the Hip Kit Club website, to secure yours today! 
I am so glad you stopped by today!! 

Tuesday, March 03, 2015

Hip Kit Club- Layouts & a Tutorial.

The 2015 February Main kit from the +HipKitClub is rocking my world!!!

Looking for more inspiration from Hip Kits? Here is a link to my Hip Kit Club Pinterest board filled with amazing projects from the DT.


I have had x2 pages up on the blog so far...check them out!

When playing with the patterned papers on my desk, I was immediately drawn to the doors paper. Firstly, isn’t it seriously cool & secondly, isn’t the paper quality super interesting? It lends itself to mixed media & is substantial enough to withstand water, ink, gesso & other ‘wet’ treatments.
It spoke to me, sparking the following thoughts in my brain in reference to my 10 year old:
  • Future
  • Destiny
  • Open Doors
  • Life Choices
  • Colorful Memories
  • Growing up
These ideas came together, as this page :)

Dream Big by Kim Watson
For the title I roughly cut ‘Dream Big’ from the We R Memory Keepers- Love Notes- Dear Diary paper, using a craft knife & doodled the edge in fine black marker for definition.
 To start, I grabbed water-colour paints & licked some funky colors onto the doors, giving them a cheerful vibe. Once dry, I cut them out & arranged them in an overlapping row creating a border for the journal block. The central page layout worked well here, allowing ones eye to travel down the page from the title, to the photograph & lastly resting on the journaling.

For more detailing check out this blog post >>

 This is my other page:

For this post, I shared a super way to transform patterned paper into something gorgeously ‘bling-ified’ (In case you were wondering, yes that is a real word in the vocab’ of every crafter who likes gold glitter)…like me- LOL.

To do this I am going to be using the February 2015 Hip Kit & Add-On Kits, as well as the pretty turquoise tissue wrapping paper our February 2015 Hip Kit came wrapped in.
Girl Powa by Kim Watson

To create that cool glittered strip, I used the wonderfully ingenious invention, called adhesive sheets from +Scrapbook Adhesives by 3L 
This is how I did it:
  • Lay the edge of the paper triangle onto the sticky side of the adhesive sheet.
  • Trim off the excess.
  • Remove the top, protective layer.
  • Sprinkle liberally with fine gold glitter.
  • Press down firmly, making sure the glitter is secured well. You don’t want it falling off :D
  • Tap off any loose glitter…& you are done.
  • NOTE: I left a little glittered strip at the bottom of the triangle, which I trimmed off & cut into mini triangles for accenting elsewhere on the page.

Tissue Bloom Tutorial by Kim Watson
Instructions:
  • Fold the tissue paper into squares in x2 (or more) different sizes. I made x20 layers in total by cutting them in piles of about 6-8 layers.
  • Once you are happy with the amount, pile them on top of each other.
  • Using a stapler, secure the pile together with criss-crossed staples.
  • Place your flower on one hand & gently scrunch with the other. Pinching layers onto a clump.
  • Place the crunched flower on your craft mat & work with the petals. Flatten some, crinkle others & arrange until you have a lovely, puffy bloom.
  • Using a little water, lightly spray the flower before spritzing with turquoise Dylusions Ink, adding vibrant color.
  • Allow it to dry & secure to your page using a strong adhesive.
All done….a striking page that will make your teenage daughter happy.
I appreciate you stopping by!! 

Happy Tuesday!